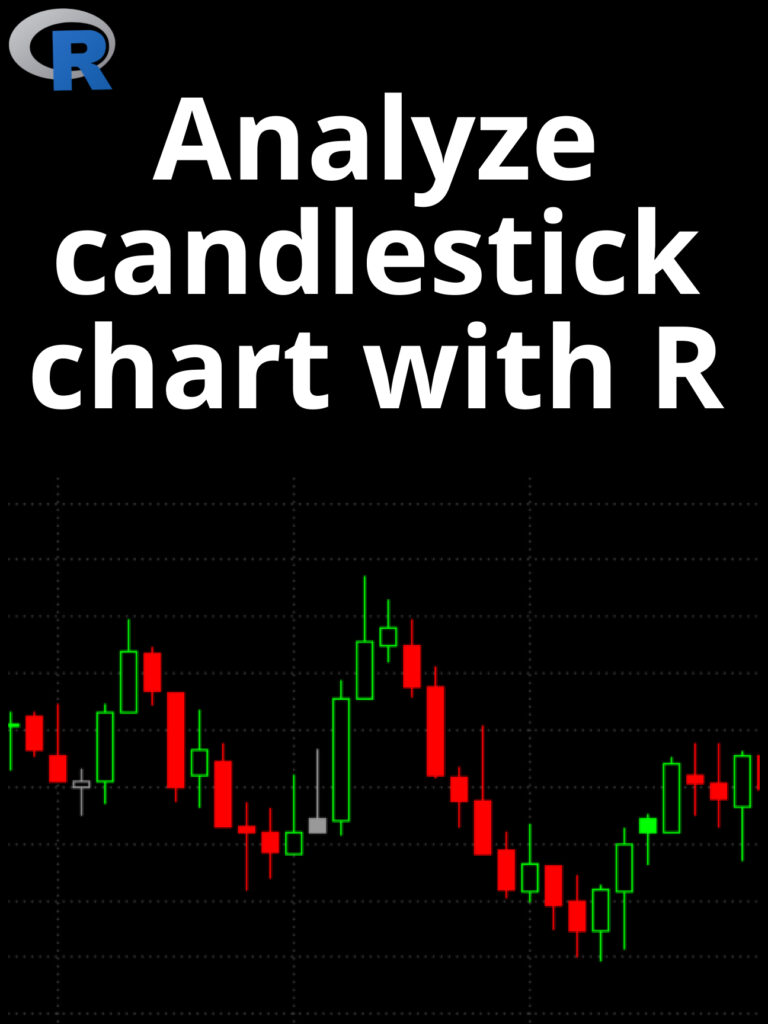
Best Ways To Scraping Data With R

Best Ways To Scraping Data With R: Scraping data refers to the process of extracting information from websites and other online sources. The data collected can be used for various purposes, such as market research, competitor analysis, and content creation. There are several ways to scrape data with R, depending on the type of data and the source of the data. Here are some common methods:

Best Ways To Scraping Data With R
  1. Using the rvest package: The rvest package provides easy-to-use tools for web scraping. Here is an example code to scrape the titles and authors of the articles on the New York Times homepage:
library(rvest)

url <- "https://www.nytimes.com/"
page <- read_html(url)

titles <- page %>%
  html_nodes(".css-1qiat4j") %>%
  html_text()

authors <- page %>%
  html_nodes(".css-1n7hynb") %>%
  html_text()

data <- data.frame(title = titles, author = authors)
  1. Using the RSelenium package: The RSelenium package provides a way to automate web browsers using R. Here is an example code to scrape the titles and URLs of the articles on the New York Times homepage using RSelenium:
library(RSelenium)
library(rvest)

remDr <- remoteDriver(browserName = "chrome")
remDr$open()

url <- "https://www.nytimes.com/"
remDr$navigate(url)

page <- read_html(remDr$getPageSource()[[1]])

titles <- page %>%
  html_nodes(".css-1qiat4j") %>%
  html_text()

urls <- page %>%
  html_nodes(".css-1qiat4j a") %>%
  html_attr("href")

data <- data.frame(title = titles, url = urls)

remDr$close()
  1. Using the httr package: The httr package provides functions to make HTTP requests and handle responses. Here is an example code to scrape the current Bitcoin price from the Coinbase API using the httr package:
library(httr)

url <- "https://api.coinbase.com/v2/prices/BTC-USD/spot"
response <- GET(url)
data <- content(response)$data

price <- data$amount
currency <- data$currency

print(paste("Bitcoin price:", price, currency))

Try challenging yourself with interesting use cases and uncovering challenges. Scraping the web with R can be really fun!

Download(PDF)

Automate The Boring Stuff With Python

Automate The Boring Stuff With Python: Python is a powerful language that can be used to automate a wide range of tasks. Here are some steps to get started with automating boring stuff with Python:

Automate The Boring Stuff With Python
  1. Identify the task you want to automate: The first step is to identify the task or tasks that you want to automate. These can be anything from sending repetitive emails to scraping data from a website.
  2. Break down the task into smaller steps: Once you have identified the task, break it down into smaller steps. This will help you understand the process and identify areas where you can automate.
  3. Write Python code to automate the task: With the task broken down into smaller steps, start writing Python code to automate each step. There are many Python libraries and modules that can help with automation, such as Selenium for web automation and PyAutoGUI for GUI automation.
  4. Test the code: Once you have written the code, test it thoroughly to ensure that it works as expected. If there are any errors or bugs, debug the code and try again.
  5. Schedule the automation: Once you are confident that the code works, you can schedule it to run automatically at a specific time or on a specific trigger. This can be done using tools like Task Scheduler on Windows or cron on Linux.
  6. Monitor the automation: Finally, monitor the automation to ensure that it is running correctly and making the desired changes. If there are any issues, debug the code and make the necessary adjustments.

By following these steps, you can automate boring tasks and free up your time for more important things.

Download:

Logistic regression with R

Logistic regression with R: Logistic regression is a type of statistical model used to analyze the relationship between a binary outcome variable (such as yes/no or true/false) and one or more predictor variables. It estimates the probability of the binary outcome based on the values of the predictor variables. The model outputs a logistic function, transforming the input values into a probability range between 0 and 1. Logistic regression is commonly used in fields such as medicine, social sciences, and business to predict the likelihood of a certain outcome based on given input variables. To perform logistic regression in the R programming language, you can follow the following steps:

Logistic regression with R: Logistic regression is a type of statistical model used to analyze the relationship between a binary outcome variable (such as yes/no or true/false) and one or more predictor variables.

Step 1: Load the required packages

library(tidyverse)
library(caret)

Step 2: Load the data

data <- read.csv("path/to/your/data.csv")

Step 3: Split the data into training and testing sets

set.seed(123)
training_index <- createDataPartition(data$target_variable, p = 0.8, list = FALSE)
training_data <- data[training_index, ]
testing_data <- data[-training_index, ]

Step 4: Build the logistic regression model

log_model <- train(target_variable ~ ., 
                   data = training_data, 
                   method = "glm", 
                   family = "binomial")

Step 5: Predict using the model

predictions <- predict(log_model, newdata = testing_data)

Step 6: Evaluate the model’s performance

confusionMatrix(predictions, testing_data$target_variable)

This is a basic logistic regression model building and evaluation process. You can modify the code according to your specific use case.

Download(PDF)

The Essentials of Data Science: Knowledge Discovery Using R

The Essentials of Data Science: Knowledge Discovery Using R: R is a powerful tool for data science that allows you to perform data preparation, data exploration and visualization, statistical analysis, machine learning, and communication all within the same environment. With its extensive libraries and active community, R is an essential tool for any data scientist. In this article, we will discuss the essentials of data science using R.

The Essentials of Data Science: Knowledge Discovery Using R
  1. Data Preparation The first step in any data science project is data preparation. This involves cleaning and transforming raw data into a form that can be analyzed. Common data preparation tasks include data cleaning, data transformation, and data integration. R has many built-in functions and packages for data preparation, including dplyr, tidyr, and lubridate.
  2. Data Exploration and Visualization Once the data has been prepared, the next step is data exploration and visualization. This involves analyzing the data to gain insights and identify patterns. R has many powerful visualization packages, including ggplot2 and lattice, that allow you to create a wide range of visualizations, such as scatter plots, bar charts, and heat maps.
  3. Statistical Analysis After data exploration, the next step is statistical analysis. This involves using statistical methods to test hypotheses and make predictions. R has many built-in functions and packages for statistical analysis, including lm() for linear regression and glm() for generalized linear models.
  4. Machine Learning Machine learning is a subfield of data science that involves using algorithms to learn from data and make predictions. R has many powerful machine learning packages, including caret, mlr, and tensorflow, that allow you to build a wide range of machine learning models, such as linear regression, decision trees, and neural networks.
  5. Communication The final step in any data science project is communication. This involves communicating your findings and insights to stakeholders in a clear and concise manner. R has many powerful tools for communication, including R Markdown and Shiny, that allow you to create interactive reports and dashboards.

Download(PDF)

Create a ggalluvial plot in R

Create a ggalluvial plot in R: A ggalluvial plot, also known as an alluvial diagram, is a type of visualization used to show how categorical data is distributed among different groups. It is particularly useful for visualizing how categorical variables are related to each other across different levels of a grouping variable.

Create a ggalluvial plot in R

To create a ggalluvial plot in R, you can follow these steps:

Step 1: Install and load the required packages

install.packages("ggplot2")
install.packages("ggalluvial")
library(ggplot2)
library(ggalluvial)

Step 2: Prepare the data

The ggalluvial package requires data to be in a specific format. The data must be in a data frame where each row represents a single observation, and each column represents a category. Each category column should have a unique name, and each row should have a unique identifier.

Here is an example data frame:

# create example data frame
data <- data.frame(
  id = c(1, 2, 3, 4, 5, 6),
  gender = c("Male", "Male", "Female", "Male", "Female", "Female"),
  age = c("18-24", "25-34", "35-44", "18-24", "25-34", "35-44"),
  country = c("USA", "Canada", "USA", "Canada", "Canada", "USA")
)

Step 3: Create the ggalluvial plot

ggplot(data = data,
       aes(x = gender, stratum = age, alluvium = id, fill = country)) +
  geom_alluvium() +
  geom_stratum() +
  ggtitle("Gender, Age, and Country") +
  theme(legend.position = "bottom")

The geom_alluvium() function creates the flowing paths that connect the different categories, and the geom_stratum() function adds the vertical bars that represent the categories. The ggtitle() function adds a title to the plot, and the theme() function adjusts the legend position to the bottom.

For next example, let’s use the diamonds dataset from the ggplot2 package:

data("diamonds")

Now let’s create a ggalluvial plot to visualize the relationship between cut, color, and price of diamonds:

ggplot(diamonds, aes(y = price, axis1 = cut, axis2 = color)) +
  geom_alluvium(aes(fill = cut), width = 0.1) +
  geom_stratum(width = 1/8, fill = "black", color = "grey") +
  geom_text(stat = "stratum", aes(label = after_stat(stratum)), 
            size = 3, fontface = "bold", color = "white") +
  scale_fill_brewer(type = "qual", palette = "Set1") +
  theme_minimal() +
  labs(title = "Diamonds by Cut, Color, and Price",
       subtitle = "Data from ggplot2::diamonds")

This code will create a ggalluvial plot with cut and color on the axes, and price represented by the y-axis. The alluvia are colored by cut, and the strata are filled in black with white text labels.

You can customize the plot further by adjusting the parameters in the geom_alluvium, geom_stratum, and scale_fill_brewer functions.

Download:

Building Chatbots with Python: Using Natural Language Processing and Machine Learning

Building chatbots with Python is a popular application of natural language processing (NLP) and machine learning (ML) techniques. Chatbots can be used for a variety of purposes, such as customer service, online shopping, and personal assistants.

Building Chatbots with Python: Using Natural Language Processing and Machine Learning

Here are the steps to build a chatbot with Python using NLP and ML techniques:

  1. Define the purpose and scope of the chatbot: Decide on the use case for your chatbot, the type of conversations it will handle, and the data sources it will use.
  2. Choose a chatbot framework: There are several chatbot frameworks available in Python, such as ChatterBot, NLTK, and SpaCy. Choose the one that best fits your requirements.
  3. Collect and preprocess training data: Collect relevant training data, such as customer service conversations, and preprocess the data to remove noise, extract keywords, and tokenize the text.
  4. Train the chatbot: Use machine learning algorithms such as classification or clustering to train the chatbot on the preprocessed training data.
  5. Test and evaluate the chatbot: Test the chatbot with sample conversations to evaluate its performance and identify areas of improvement.
  6. Deploy the chatbot: Once the chatbot is trained and tested, deploy it to your chosen platform, such as a website or messaging app.
  7. Continuously improve the chatbot: Monitor the chatbot’s performance and feedback from users, and make improvements to the training data and machine learning models as necessary.

Overall, building a chatbot with Python using NLP and ML techniques can be a complex process, but it has the potential to provide a valuable service to users and improve customer satisfaction.

Download(PDF)

Introduction to Scientific Programming and Simulation using R

Introduction to Scientific Programming and Simulation using R: R is a popular open-source programming language and software environment for statistical computing and graphics. It provides a wide range of statistical and graphical techniques, including linear and nonlinear modeling, classical statistical tests, time-series analysis, classification, clustering, and graphical data representations.

Introduction to Scientific Programming and Simulation using R

Scientific programming and simulation using R can be done in a variety of ways. Here are some common approaches:

  1. Using built-in functions and libraries: R provides a large number of built-in functions and libraries for scientific programming and simulation. These include functions for statistical analysis, linear algebra, numerical integration, random number generation, and more. You can use these functions and libraries to write code that performs various scientific calculations and simulations.
  2. Using third-party packages: R has a large and active community of users who have created thousands of third-party packages for various scientific domains. These packages provide additional functions and tools that extend the capabilities of R. Some popular packages for scientific programming and simulation include ggplot2 (for data visualization), dplyr (for data manipulation), caret (for machine learning), and igraph (for graph theory).
  3. Writing custom functions: If you have specific scientific calculations or simulations that are not available in built-in functions or third-party packages, you can write custom functions in R. R provides a flexible and powerful programming language that allows you to define your own functions and algorithms. You can use R’s control structures, loops, and data structures to implement your custom functions.
  4. Using RStudio: RStudio is an integrated development environment (IDE) for R that provides a user-friendly interface for scientific programming and simulation. RStudio provides features such as code completion, debugging, version control, and project management that can help you write efficient and organized code.
  5. Using parallel computing: R supports parallel computing, which can speed up scientific simulations that require intensive computation. Parallel computing involves dividing a task into smaller sub-tasks that can be executed simultaneously on multiple processors or cores. R provides several packages for parallel computing, such as parallel, snow, and foreach.

In summary, R provides a powerful and flexible environment for scientific programming and simulation. You can use built-in functions and libraries, third-party packages, custom functions, RStudio, and parallel computing to write efficient and organized code for various scientific applications.

Download(PDF)

Data Analysis and Graphics Using R

Data Analysis and Graphics Using R: R is a programming language and software environment for statistical computing and graphics. It provides a wide range of statistical and graphical techniques, including linear and nonlinear modeling, statistical tests, time-series analysis, classification, clustering, and others. R is free and open-source, which means that anyone can download and use it without paying any license fees. It is widely used in academia, industry, and government for data analysis, scientific research, and data visualization.

Data Analysis and Graphics Using R

Data analysis using R involves several steps, including data import, data cleaning, data transformation, data exploration, data modeling, and data visualization. R provides a wide range of packages and libraries that can be used for these tasks.

Graphics in R can be created using various packages, such as ggplot2, lattice, and base graphics. These packages provide a wide range of plotting functions for creating different types of charts, including scatter plots, line graphs, bar charts, histograms, and box plots.

Some of the advantages of using R for data analysis and graphics include:

  1. It is free and open-source.
  2. It has a large and active user community that provides support and resources.
  3. It provides a wide range of statistical and graphical techniques.
  4. It can handle large datasets and complex analyses.
  5. It can be easily integrated with other software tools and languages.
  6. It provides reproducible research using RMarkdown, which allows the creation of documents that combine code, data, and text.

Download:


Data Analysis From Scratch With Python: Beginner Guide

Data Analysis From Scratch With Python: Beginner Guide: Python is a popular programming language that can be used for data analysis. It provides a wide range of libraries and frameworks that enable you to easily perform data analysis tasks. Some of the popular libraries that you can use for data analysis with Python include Pandas, NumPy, Scikit-Learn, and IPython. In this beginner’s guide, we’ll explore how to use these libraries for data analysis.

Data Analysis From Scratch With Python: Beginner Guide
  1. Installing Python and Required Libraries

Before we get started with data analysis, we need to install Python and the required libraries. You can download Python from the official website and install it on your computer. Once you have installed Python, you can install the required libraries using pip, which is the package manager for Python. You can install libraries like Pandas, NumPy, Scikit-Learn, and IPython by running the following commands in your terminal or command.

pip install pandas pip install numpy pip install scikit-learn pip install ipython 
  1. Loading and Inspecting Data with Pandas

Once you have installed the required libraries, you can start with data analysis. Pandas is a powerful library that is used for data manipulation and analysis. You can load data into Pandas using various methods such as reading from CSV files, Excel files, and databases. Let’s take a look at how to load a CSV file using Pandas:

import pandas as pd

data = pd.read_csv('data.csv')
print(data.head())

In this example, we are using the read_csv method to load a CSV file named ‘data.csv’. The head() method is used to print the first few rows of the data. This will help us to get an idea of the structure of the data.

  1. Data Cleaning and Preprocessing with Pandas

Once we have loaded the data, we need to clean and preprocess it before we can perform analysis. Pandas provide various methods to clean and preprocess data such as removing missing values, dropping duplicates, and converting data types. Let’s take a look at some examples:

# Removing missing values
data = data.dropna()

# Dropping duplicates
data = data.drop_duplicates()

# Converting data types
data['age'] = data['age'].astype(int)

In this example, we use the dropna() method to remove missing values from the data. The drop_duplicates() method is used to drop duplicate rows from the data. The astype() method is used to convert the data type of the ‘age’ column to integer.

  1. Exploratory Data Analysis with Pandas

Exploratory Data Analysis (EDA) is an important step in data analysis that helps us to understand the data better. Pandas provides various methods to perform EDA such as summary statistics, correlation analysis, and visualization. Let’s take a look at some examples:

# Summary statistics
print(data.describe())

# Correlation analysis
print(data.corr())

# Visualization
import matplotlib.pyplot as plt
data.plot(kind='scatter', x='age', y='income')
plt.show()

In this example, we are using the describe() method to print summary statistics of the data. The corr() method is used to compute the correlation between the columns. The plot() method is used to visualize the relationship between the ‘age’ and ‘income’ columns.

  1. Machine Learning with Scikit-Learn

Scikit-Learn is a popular library that is used for machine learning in Python. It provides various algorithms for classification, regression, and clustering. Let’s take a look at how to use Scikit-Learn for machine learning:

# Splitting the data into training and testing sets
from sklearn.model_selection import train_test_split

Download(PDF)

Data Science essential in python

Data Science essential in python: Python is one of the most popular programming languages used for data science due to its powerful libraries and frameworks that enable data manipulation, analysis, and visualization. Below are some essential data science tools in Python:

Data Science essential in python
  1. NumPy: NumPy is a library for numerical computing in Python. It provides a high-performance array object, along with functions to perform element-wise operations, linear algebra, Fourier transforms, and more.
  2. Pandas: Pandas is a library for data manipulation and analysis. It provides data structures for efficiently storing and manipulating large datasets, along with tools for data cleaning, transformation, and analysis.
  3. Matplotlib: Matplotlib is a library for creating visualizations in Python. It provides a wide range of customizable plots, including line plots, scatter plots, bar plots, and more.
  4. Scikit-learn: Scikit-learn is a library for machine learning in Python. It provides a range of algorithms for classification, regression, clustering, and dimensionality reduction, along with tools for model selection and evaluation.
  5. TensorFlow: TensorFlow is a library for deep learning in Python. It provides a flexible framework for building and training neural networks, along with tools for visualizing and debugging models.
  6. Keras: Keras is a high-level neural networks API, written in Python and capable of running on top of TensorFlow, Theano, or CNTK. It provides a simplified interface for building and training neural networks, along with pre-built models for common use cases.

These are just a few of the essential data science tools in Python. There are many other libraries and frameworks available that can be useful for specific tasks or domains, such as Natural Language Processing (NLP), image processing, and more.

Download(PDF)